I'm starting a new quilt for a friend who likes the color orange. And judging from her Facebook photos, she likes bento boxes too. This blog entry is a covert op until the project is done and shipped. I'm betting I can finish it in 2 weeks.
6/29 - The pattern is called Bento Box, and here is the link to the pattern. I think I will do a 3 x 4 square blanket. That will make it roughly 5' x 4'.
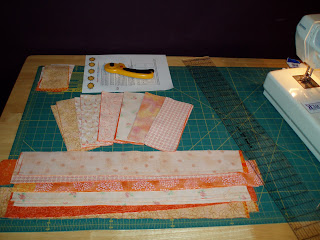
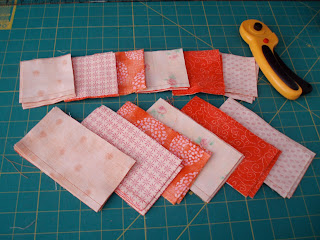
6/30 - Tomorrow I will iron the hemmed strips and I'll cut the magical part A pieces. Taking it slow, in manageable pieces.
7/1 - 3 days. 12 fabrics. 12 hems. 48 cuts. 1 mistake. 15 minutes I missed of the Today Show, fixing it this morning. Not too bad.
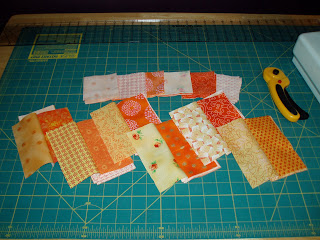
7/2 - Last night, after I came home from Stitch 'n Bitch, I looked at my table of fabrics and sighed. It was too late to make good on my personal pledge to work on the quilt every night until it was done. Marky consoled me by taking a look at my work. "Let's see this quilt," I think his words were. Being careful not to touch the diagonal arrangement I'd displayed on the dining room table, he then said, "these are really nice colors, Breezy." Emphasis on nice. At that moment, I saw that he was only looking at the wrong sides of the fabrics. When I began opening the hemmed strips of fabric, he did his best not to react verbally.
And here's a preliminary layout of one box:
7/3 - Rehearsal last night went late, so I used some morning time to pin the inner part of the Bento Boxes together. It's really just two rectangles, not a little square and an "L" shape. Deceptively simple!
7/4 - Even with a 12-hour gig, I did a little work on the quilt. And found a way to make 6 mistakes. I'm too embarassed to talk about it, but I will say there were 6 seams ripped. That's a total of 7 mistakes. I need to not only focus on my achievements, but also remember to plan twice, sew once.
7/5 - Woke up early and did some pinning. Also went to Starved Rock to see the mighty Acro Cats. Also known as Circus Cats. Also known as Rock Cats. They really played instruments.
7/7 - I did zero work on the quilt last night. Rather, I hosted Unconditional Craft Night with Shrinky Dink Rings. Got back to work today, sewing and ironing each quarter block.
7/8 - I sewed two quarters together, and the layout is looking pretty good.
7/9 - Okay, Friday crept up on me pretty swiftly. Was it only last Wednesday my girlfriends were laughing at me for boasting that I could finish a quilt in two weeks? My fortnight is almost up, and they're about to have that proverbial last laugh. My six blocks are now all sewn together, and I thought I'd show a mistake I made. I've been making so many. I call the above "Oopsie," and "Aah."
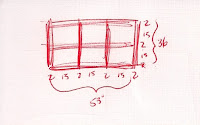
7/10 - So, JoAnn is not the be-all end-all. Hancock (my go-to fabric center) closes before I get off work on Saturdays. Fine. I was sure I could find some sort of orange calico for the back of the quilt at my favorite Craft Superstore. Green Bay Packers Fleece. Purple Lamé. Dora The Explora flannel. No quilt solids or patterns? I thought for a moment about backing this badboy with denim, but I'm really looking for something else. So my night was a bit of a waste. I did get all my measurements down for a plan, though. I suppose the blueprints are worth showing.
On the left, my preliminary plan, with 6 blocks, 3 inches of fabric between. In the bottom corner, I figured I could cut three long 3" strips off a two-yard piece, then cut the leftover in half, turn each piece, and sew them back together to make a continuous back. Oh, yeah, and make sure to get a few short 3" strips to place horizontally between blocks. Ehn. On the right, I pondered reducing the strips down to 2", making it possible to cut strips and get a non-bisected piece for the backing from a 45" piece of fabric? Double ehn. I slept on it.
I woke in the night with a plan. That, and I think the A/C shut off the power. Anyway, all I really need is one long strip for the center. I can make an extra wide/long backing and fold the frame around to the front, right? The short, horizontal pieces will be easy to come by. I think all I need is 2 yards of fabric and a nice big floor.


Stitching is done. Roger approves. I checked the calendar to see if I made my two-week deadline, and I'm two days early. Now to mail it off. I don't think I can wait to see her in person in October!
7/11 - Crunch Time. Here are the blocks, and a potential layout. I keep changing my mind about the order. It will happen how it happens.
I cut and sewed three short vertical strips between blocks, then two long horizontal strips with the new backing fabric. Shown are batting with measured and ironed backing fabric.

Close-up of a pinned block. I put a safety pin in the middle, because I never know which direction I'll be facing when it's time to quilt the middle parts. I'll stitch a cross in each block, and that should be enough.

Stitching is done. Roger approves. I checked the calendar to see if I made my two-week deadline, and I'm two days early. Now to mail it off. I don't think I can wait to see her in person in October!


